A soft-touch grip passes the thumbnail test on the first samples, then starts lifting at the edge after a few weeks of handling and cleaning. The datasheet promised "excellent adhesion" to that substrate. The problem is that "good adhesion" is not a single number that transfers from one material pair, specimen, or process to another.
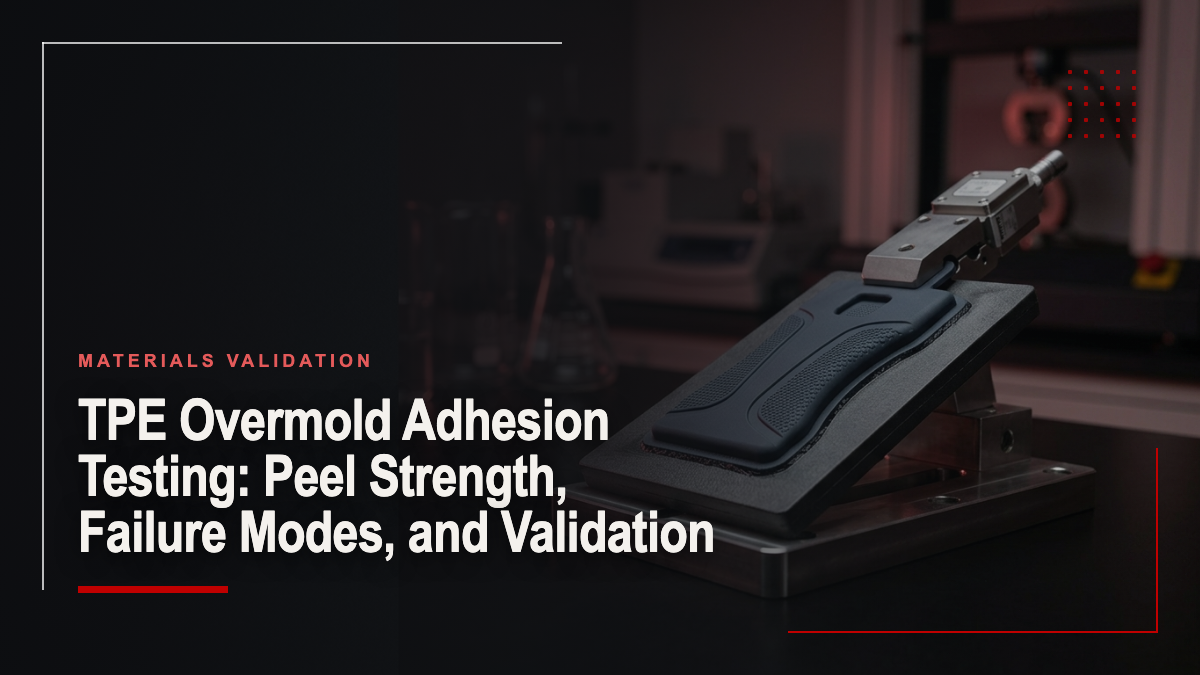
A peel result means something only when the specimen geometry, peel direction and angle, peel rate, conditioning, and failure mode are recorded with it. TPE overmold adhesion testing should therefore be designed around a specific question: will this bond survive the loads and environments of this product? A high laboratory value obtained under different conditions does not answer that question on its own.
What Good Adhesion Means in a TPE Overmold
Before a peel number can be judged, it helps to be clear about what the test is actually loading and what a good result should look like.
Interface strength versus material strength
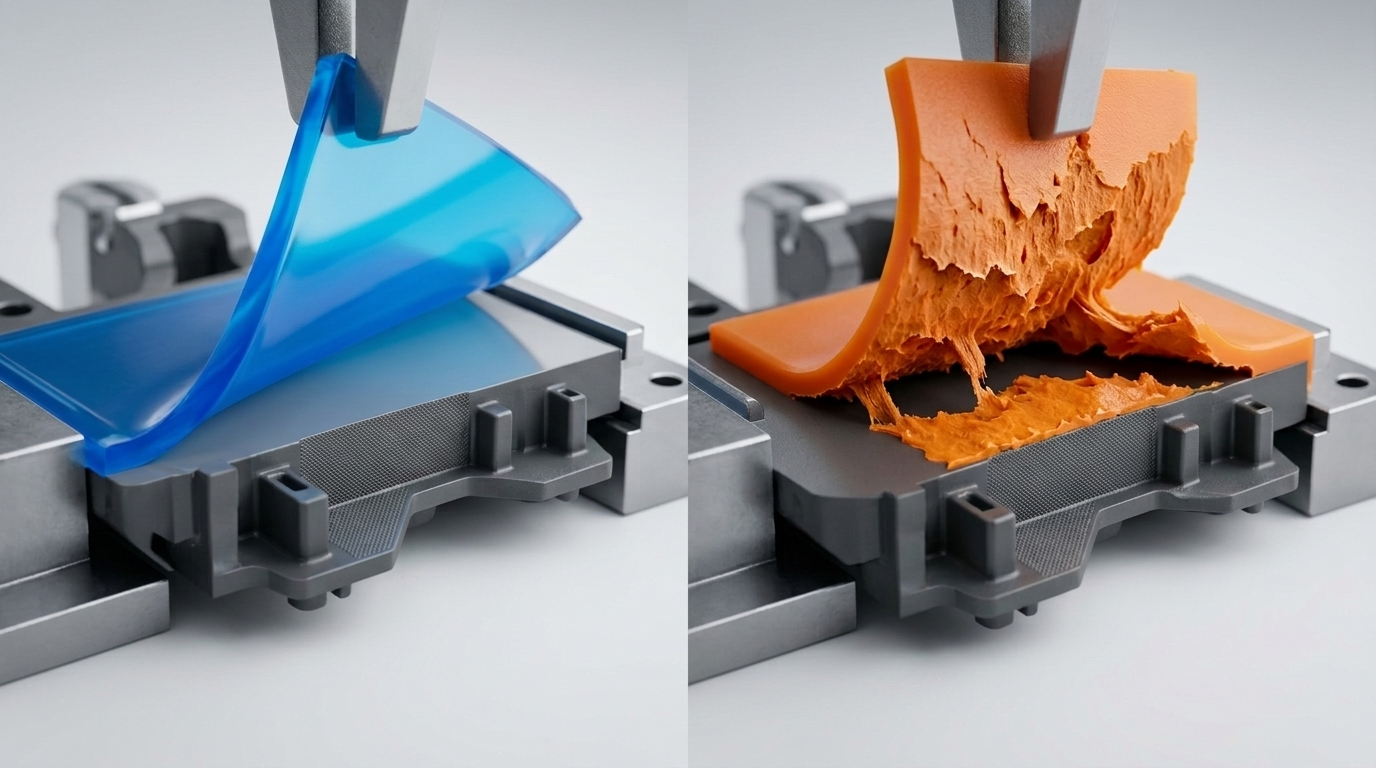
A peel test loads the interface between the thermoplastic elastomer (TPE) and the rigid substrate, but the specimen can fail in more than one place. It can separate cleanly at the interface, tear within the TPE, or, in some designs, crack the substrate. The measured force reflects whichever of these is weakest under the test conditions.
Adhesive and cohesive failure
Teknor Apex, a TPE compounder, describes adhesive failure as the TPE peeling cleanly from the substrate and cohesive failure as the TPE material tearing before it separates from the substrate; it describes cohesive failure as the more desirable mode. KRAIBURG TPE, in its VDI 2019-based testing, evaluates the peel pattern alongside the peel force and rates patterns qualitatively from A to D, with D indicating the strongest bond.
Cohesive failure is an important engineering signal: it suggests the interface is at least as strong as the elastomer under that test. It is not an automatic universal pass criterion. A very soft TPE can fail cohesively at a low force that is still insufficient for the product, and a cohesive tear under dry room-temperature testing does not prove the interface will behave the same after heat or fluid exposure.
Define the service requirement first
Before choosing a test, define what the bond must survive: edge peel from fingernails or tools, shear from gripping, flexing cycles, compression at a seal, heat, cleaning agents, skin oils, or sterilization. These loads determine the test direction, specimen design, and conditioning, and they determine whether peel testing alone is sufficient.
Screen the Material Pair and Interface Conditions
Many weak bonds are decided before the first specimen is molded, by the materials chosen and the condition of the interface.
Compare exact grades, not families
Adhesion data belong to a specific TPE grade on a specific substrate grade. Avient's overmolding guide notes that its overmold TPE families are formulated for different substrates, from polyolefins to engineering resins such as PC, ABS, acetal, and nylon, and lists substrate grade factors, such as glass-filled, mineral-filled, heat-stabilized, or lubricated formulations, as additional factors affecting adhesion. A result for "TPE on PC" is not transferable to a different TPE grade or a glass-filled PC.
Consider compatibility and interface conditions
Chemical compatibility, including polarity and solubility parameters, influences whether the two materials can bond at the interface. Processing conditions also matter: Teknor Apex and Avient both report that higher TPE melt temperature generally increases bond strength, within the material's processing limits. Avient adds that nozzle setpoint can differ significantly from actual melt temperature, and recommends measuring an air shot with a pyrometer.
Separate two-shot from insert molding
Two-shot and insert overmolding create different interface conditions. In two-shot molding, the substrate is still warm when the TPE contacts it; in insert molding, the substrate may have cooled and been stored. Avient states that for some overmold TPEs there may be a significant difference in bond strength between the two processes, and that a material bonding well in two-shot molding may bond poorly when insert molded. Results from one process should not be used to approve the other. Our comparison of insert molding vs. overmolding outlines how the two process routes differ.
Record the substrate state
For insert molding, Avient notes that contaminated insert surfaces can cause loss of adhesion, that skin oil can affect bonding, and that mold release should not be used in either process. It also notes that moisture in both the overmold grade and the substrate can adversely affect adhesion, and that substrate preheating can help in some combinations but is strongly discouraged for nylon inserts with one of its TPE series. Record substrate texture, cleanliness, moisture state, storage time, handling method, and any surface treatment with every test batch. For hygroscopic substrates, the moisture state should be measured rather than inferred from dryer settings; see how to prove the resin is dry.
Design a Peel Test That Can Be Repeated and Compared
A peel test is useful only if another lab, or the same lab next month, can repeat it and obtain comparable results.
Select a method that fits the specimen
Three published methods are commonly referenced:
| Method | What it covers | Practical note |
|---|---|---|
| ASTM D6862-11(2021) | 90° peel resistance of an adhesive bond between one rigid and one flexible adherend | Adherend thickness generally influences results; adherends, preparation, and conditioning are agreed between the parties |
| ISO 813:2019 | Adhesion of vulcanized or thermoplastic rubber to a single rigid plate by 90° peel | Not intended for very hard rubbers |
| VDI 2019:2016-04 | Adhesion of TPE on thermoplastic substrates using specimens made by two-component injection molding | Determines peeling resistance as a characteristic adhesion value |
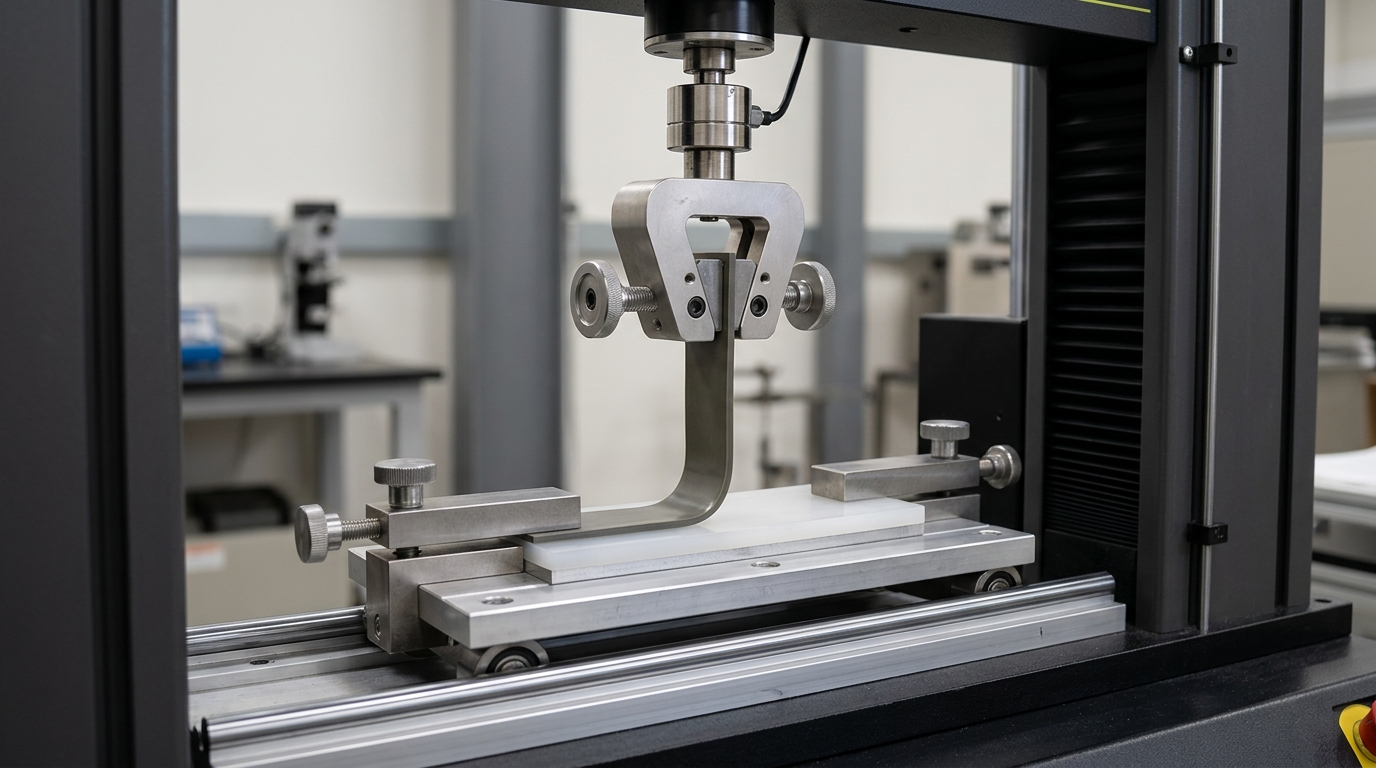
VDI 2019 is written specifically for two-component injection-molded TPE specimens. KRAIBURG TPE describes its VDI 2019-based test using a 150 × 60 × 2 mm thermoplastic base overmolded with a 150 × 20 × 2 mm TPE strip, peeled at a constant 90° angle, with results reported in N/mm together with the peel pattern.
Fix the test variables in writing
Specify specimen dimensions and thickness, TPE and substrate grades, molding conditions, the time between molding and testing, conditioning, peel angle, peel rate, grip arrangement, the force value reported (peak, average over a defined path length, or both), and the unit. ASTM D6862 notes that adherend thickness generally influences results and should be specified.
Test enough specimens
One attractive result does not describe a process. Test enough specimens to see the spread, and record the individual values rather than only the mean. If specimens come from multiple cavities or tools, keep cavity identification, because results from specimens molded in different tools may not be directly comparable.
Do not compare thresholds across methods
Supplier guidance illustrates why. Teknor Apex reports that, in its ASTM D6862 testing, peel forces above 15 lbf/in indicate excellent adhesion and 10 lbf/in or below indicate poor adhesion. KRAIBURG TPE treats at least 2.5 N/mm in its VDI 2019-based test as the start of good bonding, expects most materials to exceed 3.5 N/mm, and excludes very soft grades of about 20–30 Shore A from that expectation. Hardness therefore matters when reading peel data; the guide to Shore A and Shore D hardness explains how the two scales differ. Although 15 lbf/in is roughly 2.6 N/mm, the specimens, test setups, and evaluation rules differ. These values are useful as each supplier's internal reference for its own materials, not as interchangeable acceptance limits for a product.
Record Adhesive and Cohesive Failure Modes Separately
Failure location often tells you more than peak force. For each specimen:
• photograph both separated surfaces under consistent lighting; • record whether the TPE remains on the substrate (cohesive), leaves a clean substrate (adhesive), or shows a mixed pattern, and estimate the proportion of each; • note where the failure started, such as an edge, a knit line, a thin section, or a flash line; • note substrate cracking separately.
Do not average specimens with different failure modes into a single number without describing the mix. A batch with half cohesive and half adhesive failures at similar forces is a different process state from a batch with uniformly cohesive failures, even if the means match. Keeping the photographs and failure-mode notes with the agreed sample records, for example within a tooling validation package, makes later comparisons possible.
Evaluate Heat, Fluid, and Repeated-Use Effects
A bond that performs at room temperature immediately after molding may change after aging or exposure. Choose conditioning that represents the product: elevated temperature for parts near motors or in vehicles, cleaning agents for medical or appliance housings, skin oils or sunscreen for handheld products, and repeated flexing for living-hinge grips.
Test unconditioned and conditioned specimens with the same method, and compare both force and failure mode. A shift from cohesive to adhesive failure after exposure is often a more important finding than a modest drop in force, because it suggests the interface, rather than the elastomer, has become the weak point. Any result remains valid only for the documented material pair, process, and condition.
Turn Test Results into Material, Surface, and Process Actions
When adhesion is weak, use the failure mode to decide the next step:
| Observation | Likely direction | Next action |
|---|---|---|
| Clean adhesive failure across all specimens | Material incompatibility or interface condition | Confirm grade compatibility; check substrate cleanliness, moisture, mold release; review melt temperature |
| Adhesive failure only after insert storage | Contamination or interface cooling | Shorten storage, protect inserts, review handling and preheating guidance |
| Mixed modes with wide scatter | Process instability or local geometry | Check melt temperature, substrate temperature, venting, edge thickness |
| Cohesive failure at low force | Elastomer strength limits the bond | Consider a different grade or a design with mechanical interlocks |
| Cohesive dry, adhesive after exposure | Interface degraded by service condition | Revisit material pair or add mechanical retention |
Define the acceptance logic before testing, including the required force, the acceptable failure modes, the conditioning sequence, and what happens when results are mixed. Revalidate after a change in TPE or substrate grade, colorant, tool, process, or material supplier. Avient specifically notes that the color concentrate carrier can affect adhesion, so a color change can also be a bond change.
Our overmolding service reviews part geometry, application environment, and performance requirements before recommending a substrate and overmold combination, and our published inspection steps include checking that the overmold remains attached under expected handling conditions. Formal peel-test methods and acceptance limits should be specified by the product owner for each application.
Frequently Asked Questions
These questions reflect the issues engineers raise most often when setting acceptance criteria for an overmolded bond.
What is a good peel strength for a TPE overmold?
It depends on the material pair, specimen, method, and product requirement. Supplier references exist, such as Teknor Apex's 15 lbf/in in its ASTM D6862 testing and KRAIBURG TPE's 2.5–3.5 N/mm range in its VDI 2019-based test, but they are not interchangeable. Set the acceptance value from the service requirement and the agreed method.
Is cohesive failure always a pass?
No. It indicates the interface is at least as strong as the TPE under that test, but a soft TPE can fail cohesively at a force below what the product needs, and the mode can change after aging or fluid exposure.
Which standard should I use for TPE adhesion testing?
ASTM D6862 and ISO 813 cover 90° peel of flexible materials from rigid substrates. VDI 2019 is specific to TPE on thermoplastic substrates made by two-component injection molding. The best choice is the one your customer and supplier agree on and can reproduce.
Why does the same TPE bond well in two-shot molding but poorly in insert molding?
The interface conditions differ. The substrate may be cooler, contaminated, or moist after storage. Avient notes that bond strength can differ significantly between the two processes.
Does a color change require adhesion revalidation?
It can. The color concentrate carrier can affect TPE adhesion to the substrate, so treat a colorant change as a potential bond change.
Conclusion
TPE overmold adhesion testing is useful only when the test is tied to a defined material pair, interface condition, and service requirement. Choose a method that fits the specimen, record geometry and test conditions with every result, and report failure mode alongside force. Treat supplier thresholds as evidence for their own material systems, not as universal acceptance limits. When results are weak or mixed, use failure location to decide whether the next action belongs to the material, the surface, the design, or the process, and revalidate whenever any of them changes.